Prompt Tuning
Overview
Welcome to the Prompt Tuning, a powerful feature that empowers you to create and manage prompts for various use-cases like Extraction, summarization, Classification, Generate.
This user guide will walk you through the steps to effectively use the Prompt Tuning feature on Katonic GenAI Platform.
Key Features
User-Friendly Interface: This feature offers an intuitive and user-friendly interface that enables users to easily input instructions and work around the prompts.
Sample Prompt Repository:
- The
Sample Promptrepository is a valuable feature that provides users with pre-built prompt examples for different use-cases, such as Extraction, Summarization, Generation, and Classification. This feature allows users to quickly access and leverage sample prompts, saving them time and effort in crafting their prompts from scratch. - Having a diverse collection of sample prompts ensures that users can find inspiration and adapt the prompts to suit their specific tasks and objectives.
Custom Prompt Management:
- The ability to create, edit, and manage custom prompts is a fundamental aspect of the "Prompt Studio." The
My Promptssection allows users to create their unique prompts tailored to their specific needs. - With this feature, users can save and organize their custom prompts for future use, empowering them to fine-tune and optimize prompts for different tasks and projects. The option to edit and delete prompts provides flexibility and control over their prompt library.
Large Language Model: The app utilizes a state-of-the-art large language model powered by generative AI to comprehend and interpret user instructions effectively. The model understands complex queries and adapts to various use cases.
Initial Dashboard
Once you access generative AI platform, you will come across various tabs, which includes the Generative AI, Tuning Studio, Deploy, Playground.
One of the tabs below GenAI is the "Tuning studio".
Click on Tuning Studio. The dashboard of tuning studio will open.
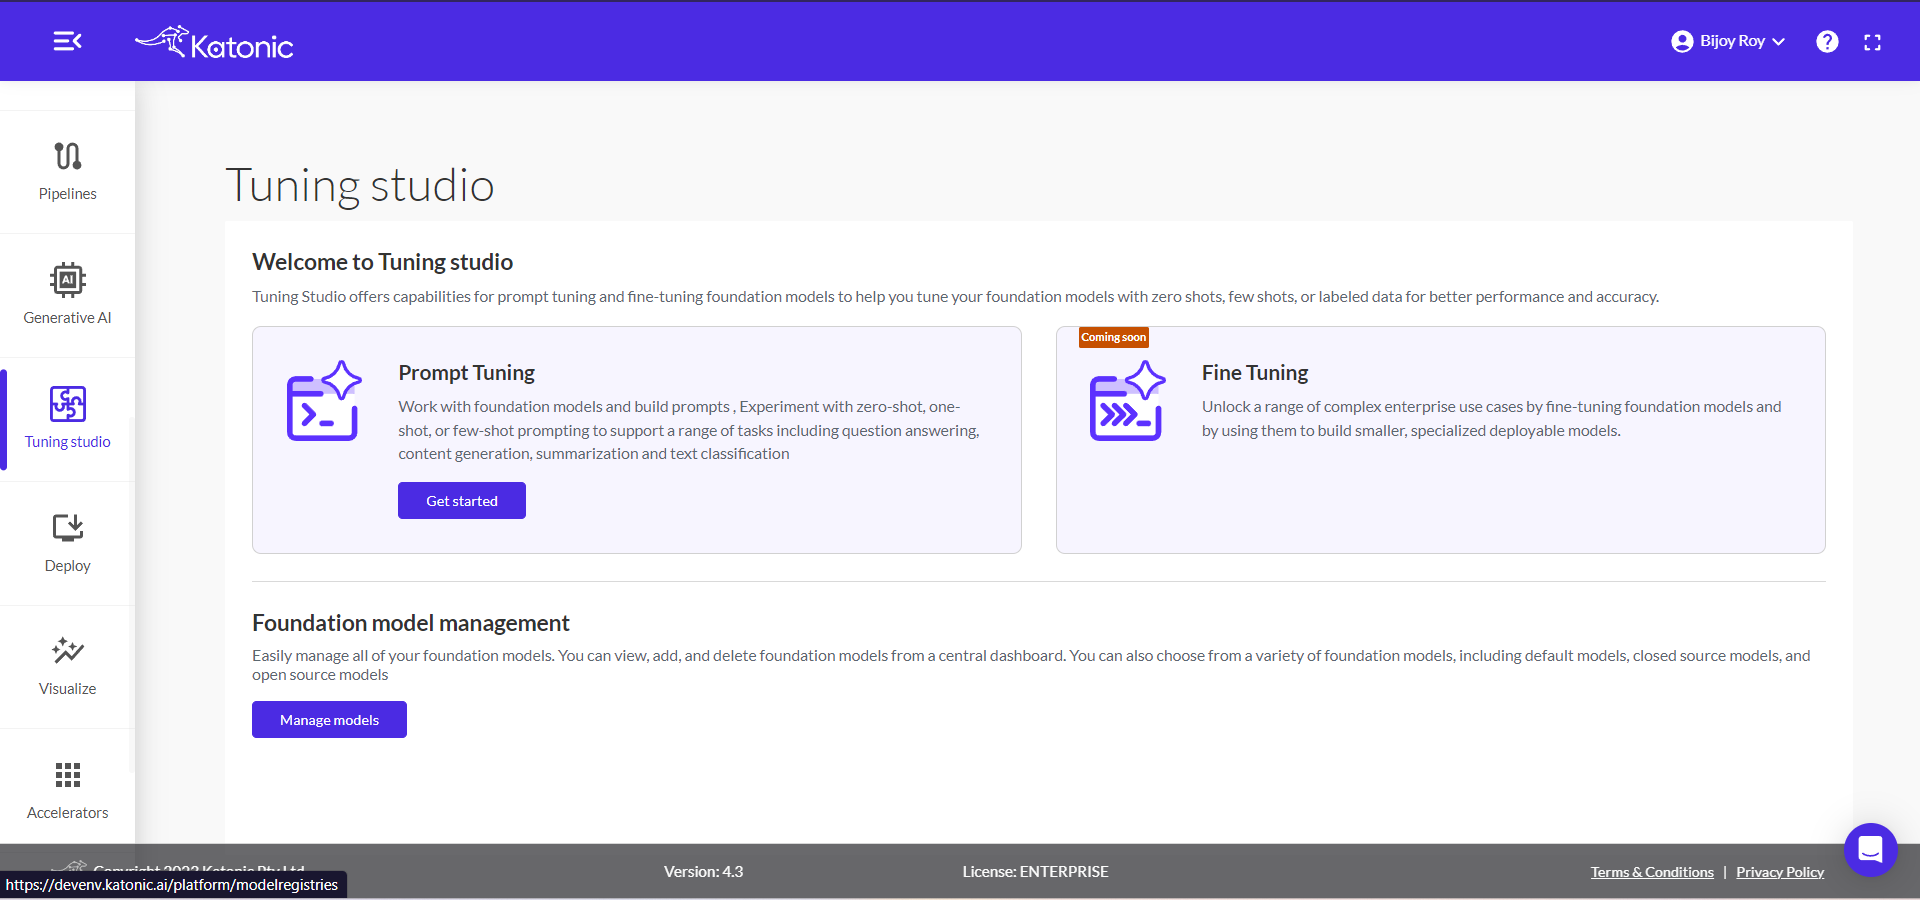
The dashboard dispays three options, which are Prompt Tuning, Fine Tuning, and Foundation model management.
Click on 'Get Started' under 'Prompt Tuning'. The dashboard of Prompt Tuning will open.
On the Dashboard you can see three options to create new prompt, use already existing ones and prompts history:
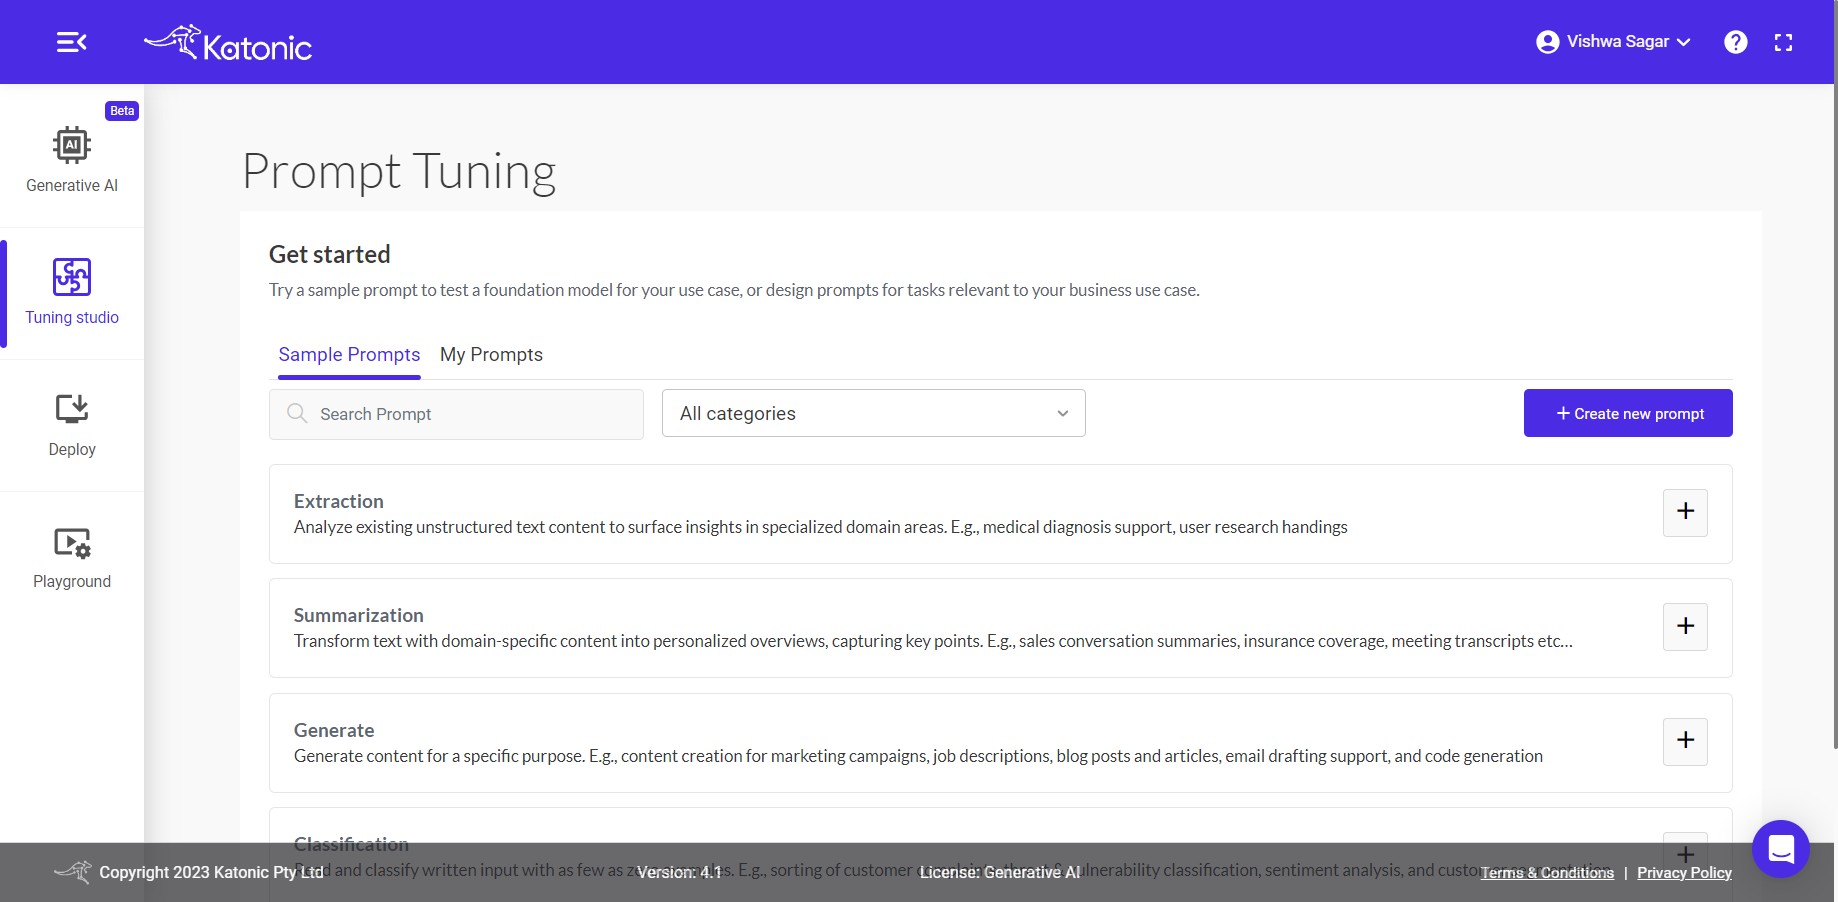
Sample Prompts : The "Sample Prompt" section offers a diverse selection of pre-built prompts for various domains like Extraction, Summarization, Classification, and Generate, covering popular business use-cases. Choose from these prompts to achieve the best results quickly and effortlessly, without the need to create prompts from scratch.
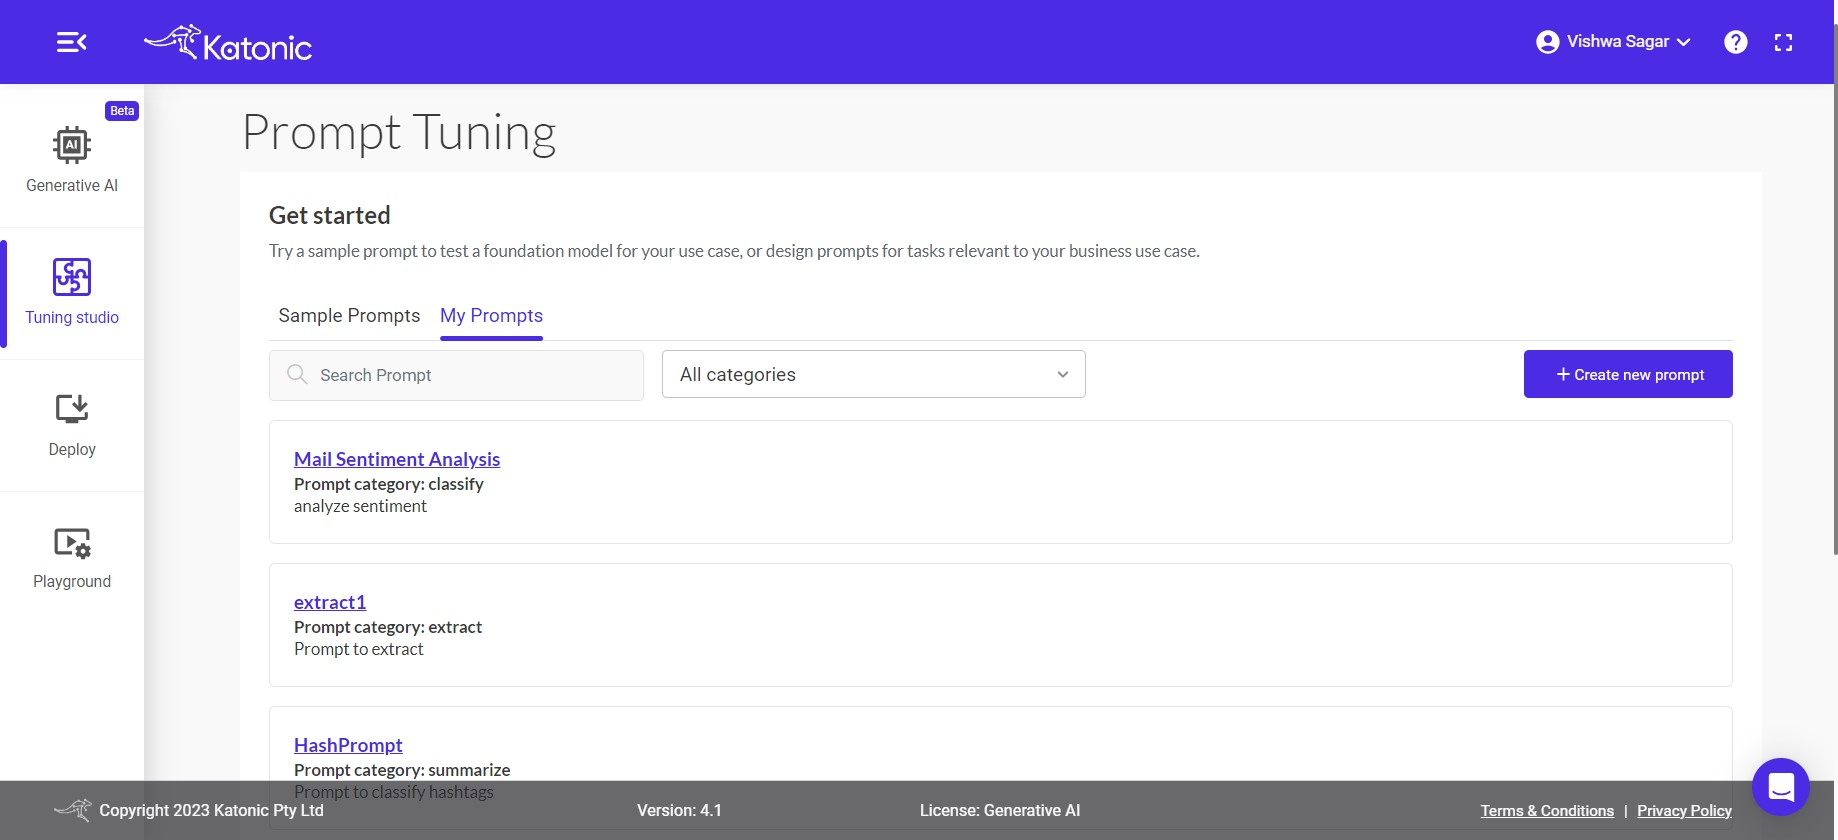
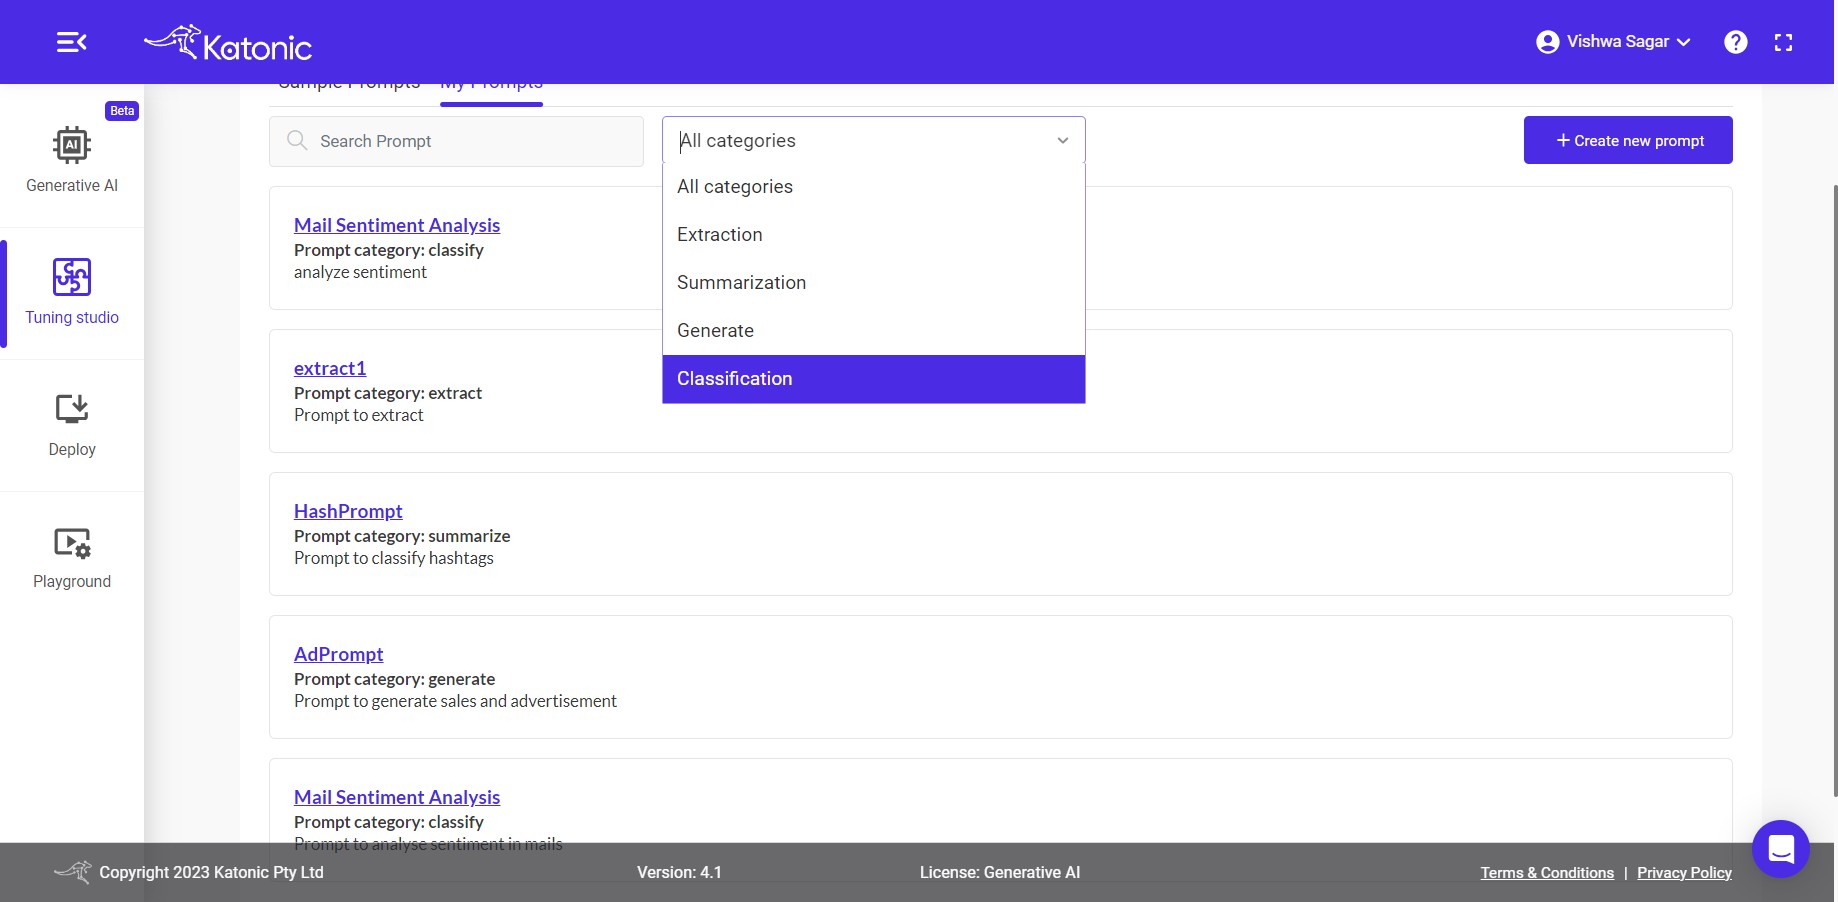
My Prompts: "My Prompts" allows you to manage your custom prompt creations effectively. You can view and organize all your created prompts here. Use the search option to find specific prompts quickly, and if you prefer, categorize your prompts for easy access within custom categories, ensuring a well-organized prompt library.
+ Create new prompt : The "Create New Prompt" option allows users to design custom prompts for new use-cases beyond the provided sample prompts. With a user-friendly prompt editor and real-time preview, users can experiment, iterate, and tailor prompts to precisely fit their tasks, unleashing their creativity and productivity.
Let's explore Sample Prompts tab
Sample Prompts
Click on Sample prompts button. You can see Various Sample Categories below like Extraction, Summarization, Generate and Classification.
Each Category contains various Business driven use-cases. You can directly use those mentioned prompts to get the quick output.
You can search for available category under search bar or select the categories under All dropdown.
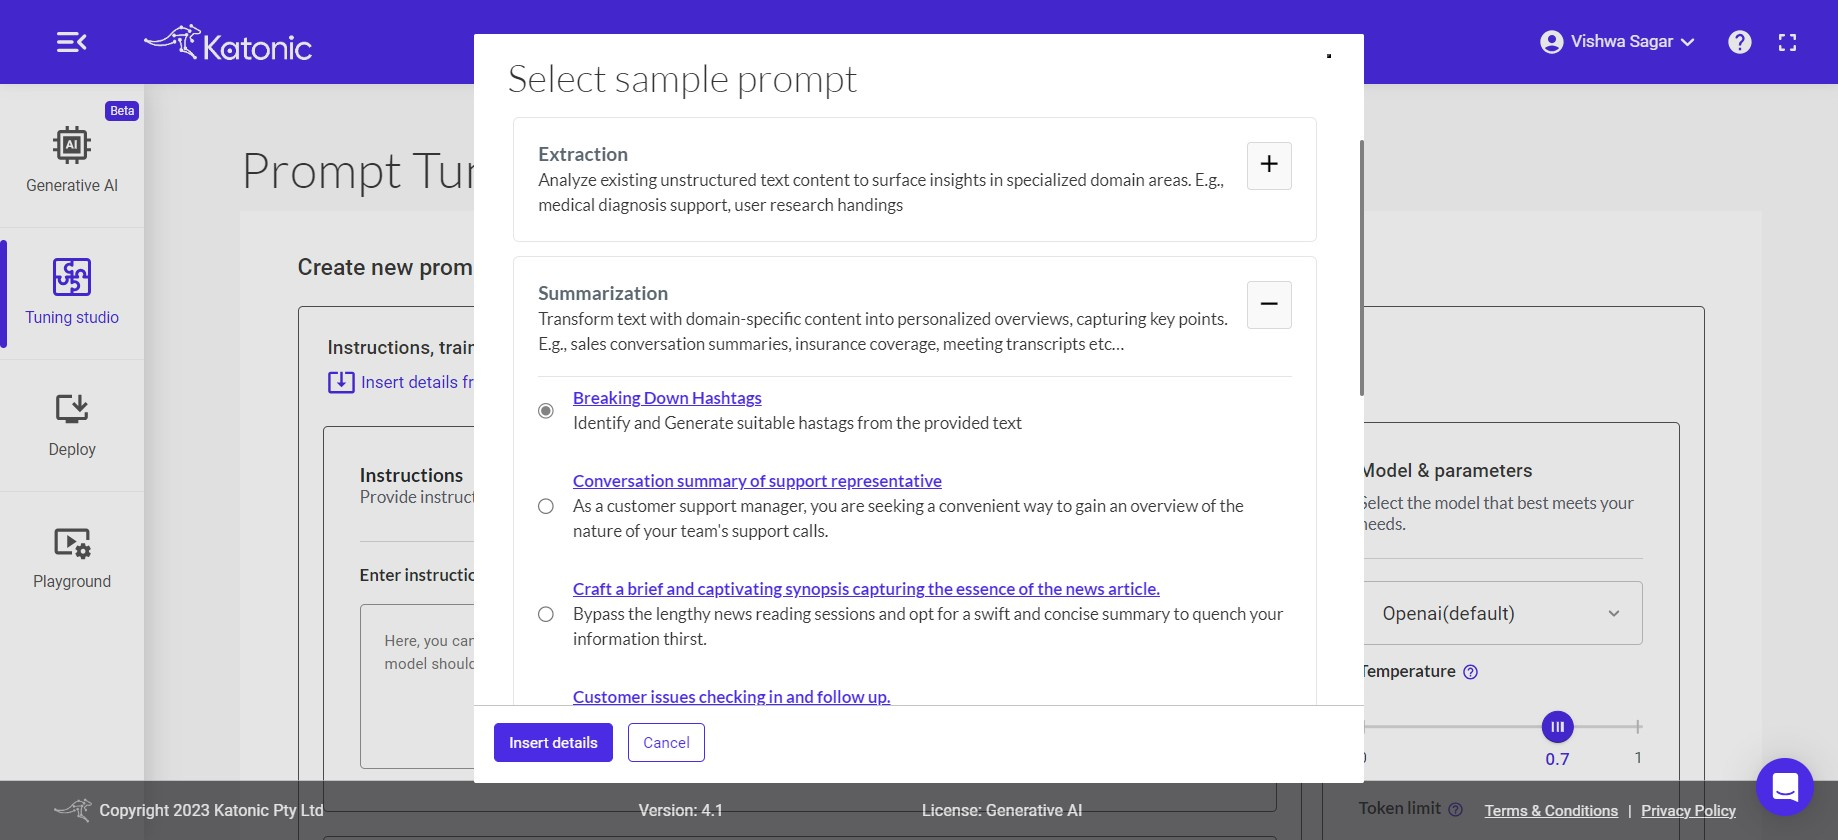
Note: Click on [ + ] button on right side of every category to expand and [ - ] to shrink the use-cases template.
1. Extraction:
Analyze existing unstructured text content to surface insights in specialized domain areas. E.g., medical diagnosis support, user research handings, Finantial Information validation.
Explore Extract Feature under GenerativeAI create project section. where you can work on Extracting your own docs.
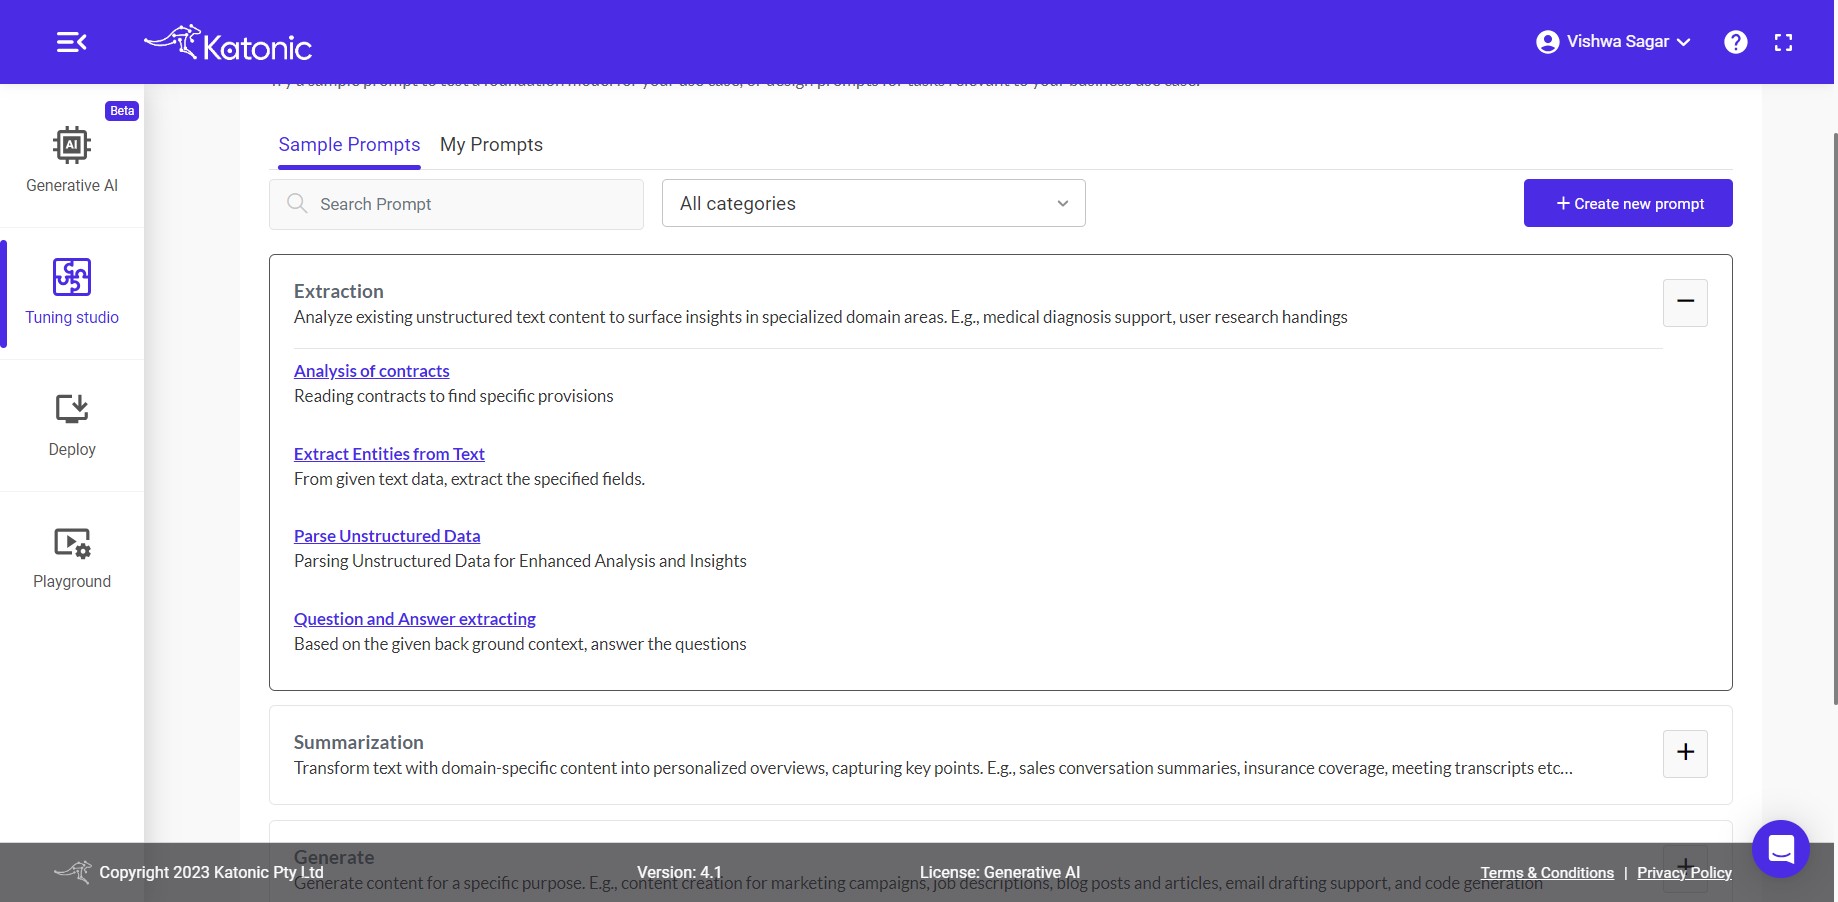
Use-cases Under Extraction:
1.1 Analysis of Contracts: Reading contracts to find specific provisions
1.2 Extracting technical specifications of pixel phone: From given text data, the technical specifications related to phone are extracted into JSON format.
1.3 Question and Answer extracting: Based on the given back ground context, answer the questions
1.4 Trouble shooting of WiFi: What should be the trouble shooting step, based on provided description.
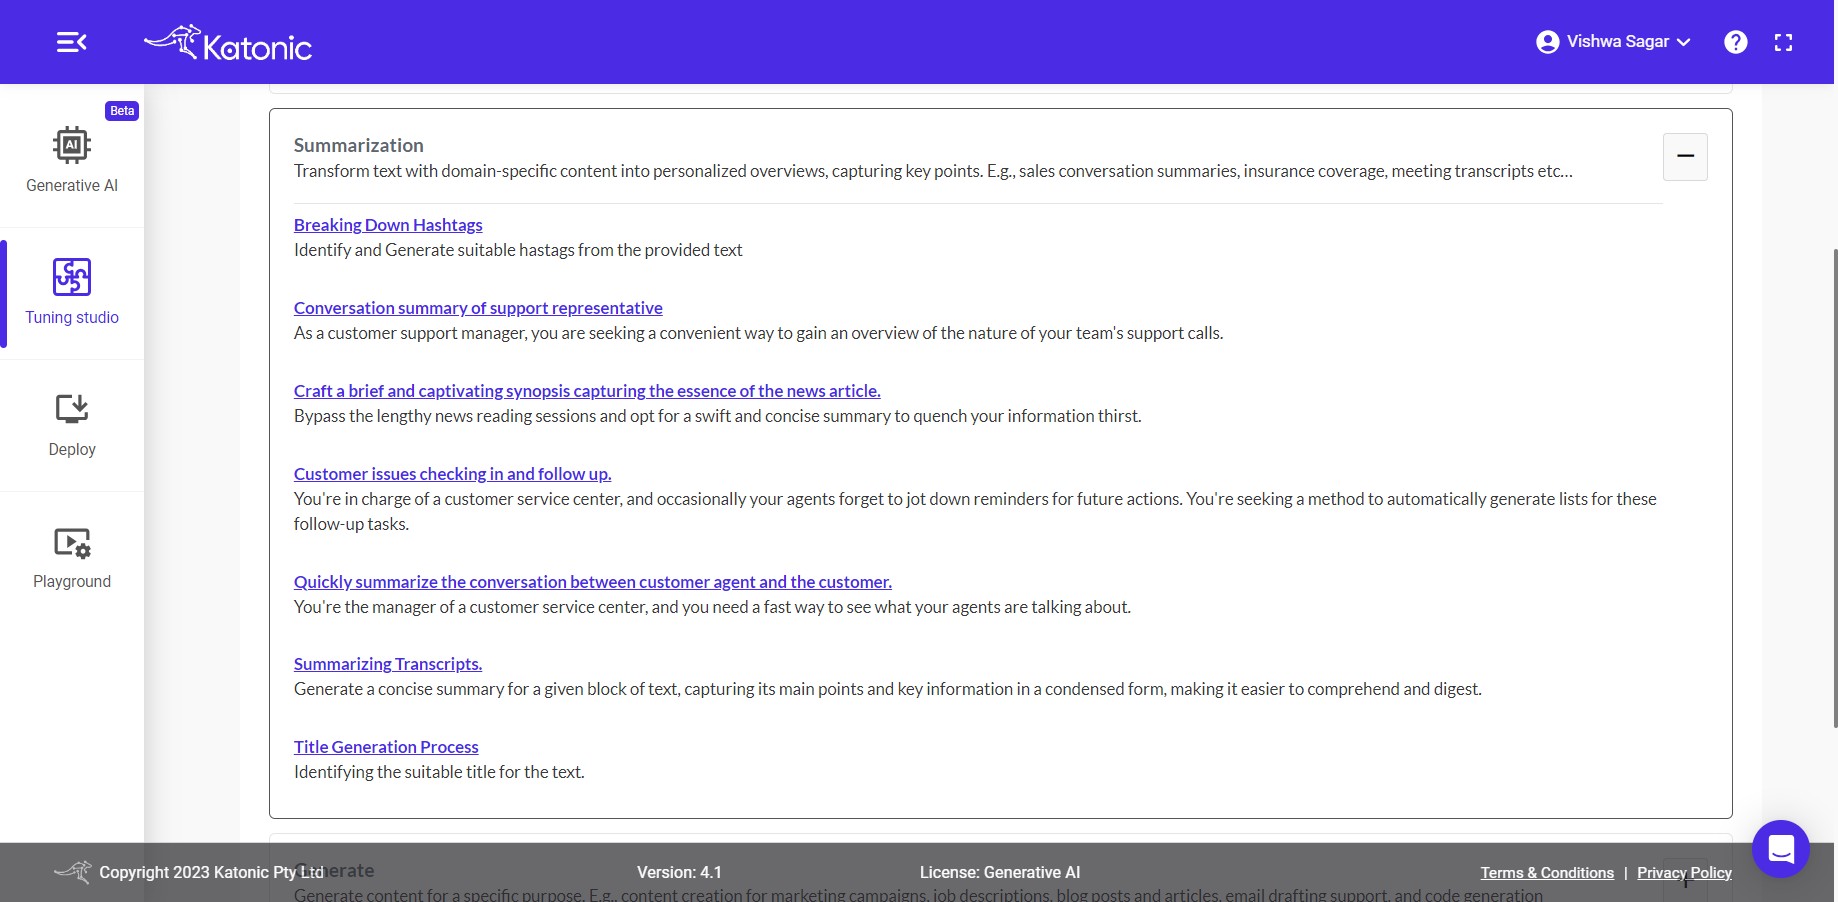
2. Summarization:
Transform text with domain-specific content into personalized overviews, capturing key points. E.g., sales conversation summaries, insurance coverage, meeting transcripts etc
Use-cases Under Summarization:
2.1 Breaking Down Hashtags: Identify and Generate suitable hastags from the provided text.
2.2 Conversation summary of support representative: As a customer support manager, you are seeking a convenient way to gain an overview of the nature of your team's support calls.
2.3 Craft a brief and captivating synopsis capturing the essence of the news article.: Bypass the lengthy news reading sessions and opt for a swift and concise summary to quench your information thirst.
2.4 Customer issues checking in and follow up.: You're in charge of a customer service center, and occasionally your agents forget to jot down reminders for future actions. You're seeking a method to automatically generate lists for these follow-up tasks.
2.5 Quickly summarize the conversation between customer agent and the customer: You're the manager of a customer service center, and you need a fast way to see what your agents are talking about.
2.6 Summarizing Transcripts: Generate a concise summary for a given block of text, capturing its main points and key information in a condensed form, making it easier to comprehend and digest.
2.7 Title Generation Process: Identifying the suitable title for the text.
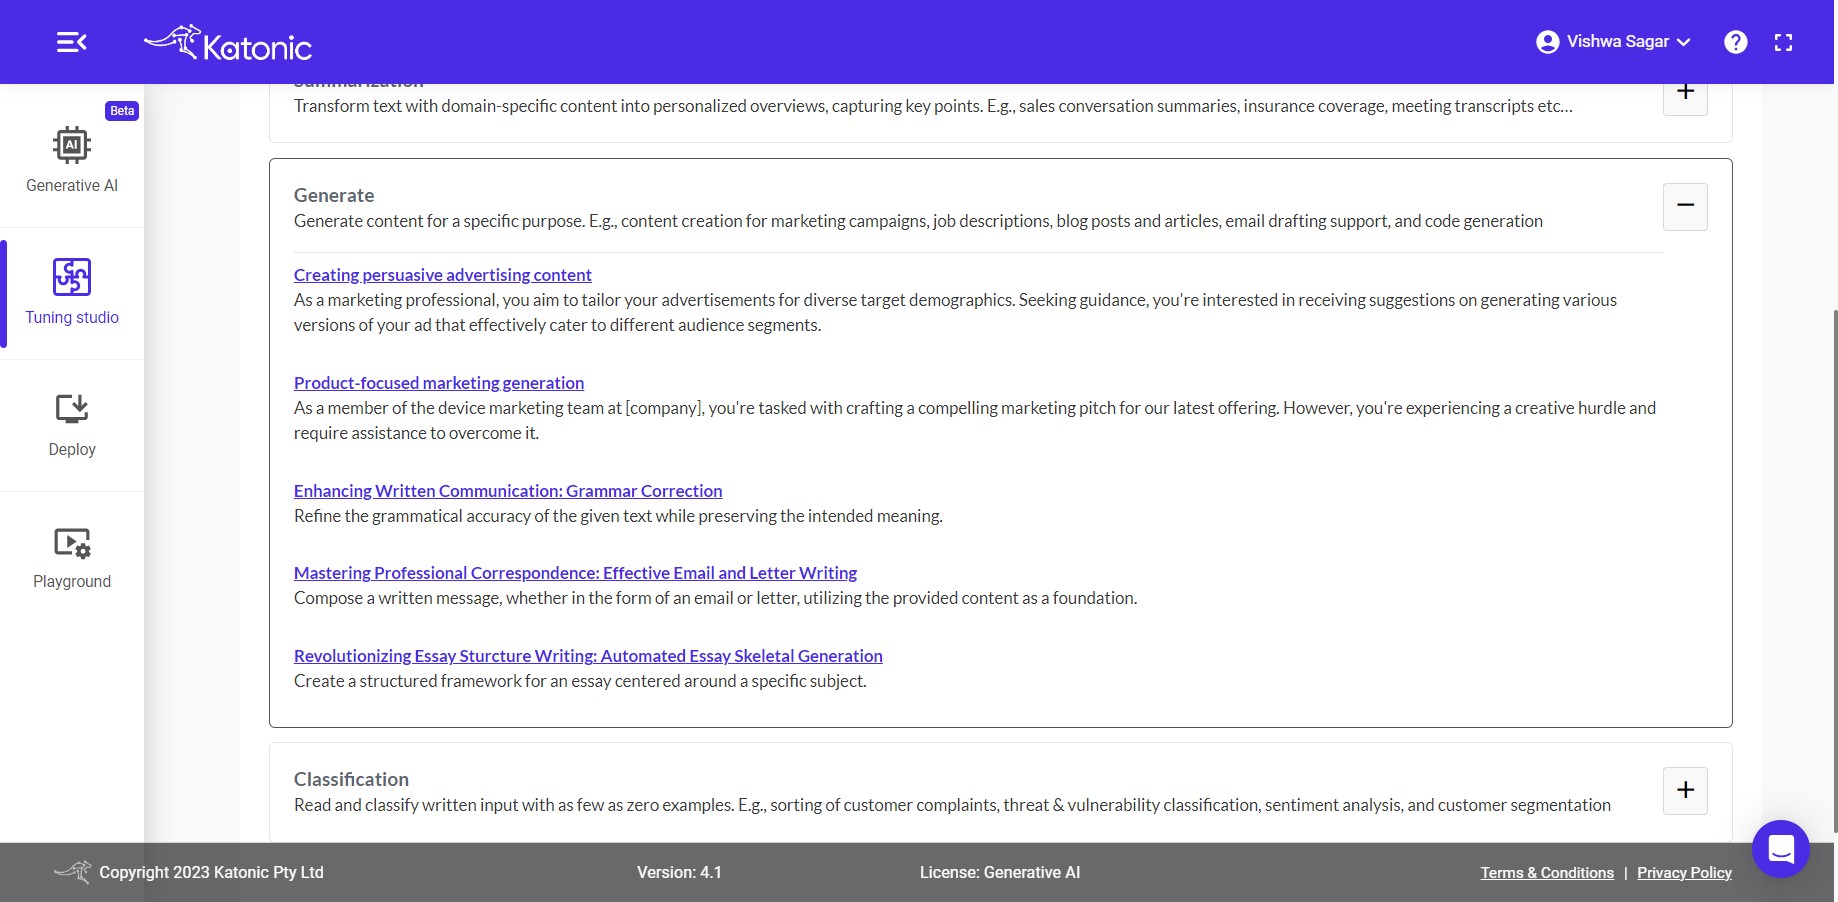
3. Generate:
Generate content for a specific purpose. E.g., content creation for marketing campaigns, job descriptions, blog posts and articles, email drafting support, and code generation.
Use-cases Under Generate:
3.1 Creating persuasive advertising content: As a marketing professional, you aim to tailor your advertisements for diverse target demographics. Seeking guidance, you're interested in receiving suggestions on generating various versions of your ad that effectively cater to different audience segments.
3.2 Product-focused marketing generation: As a member of the device marketing team at [company], you're tasked with crafting a compelling marketing pitch for our latest offering. However, you're experiencing a creative hurdle and require assistance to overcome it.
3.3 Enhancing Written Communication: Grammar Correction: Refine the grammatical accuracy of the given text while preserving the intended meaning.
3.4 Mastering Professional Correspondence: Effective Email and Letter Writing: Compose a written message, whether in the form of an email or letter, utilizing the provided content as a foundation.
3.5 Revolutionizing Essay Sturcture Writing: Automated Essay Skeletal Generation: Create a structured framework for an essay centered around a specific subject.
4. Classification:
Read and classify written input with as few as zero examples. E.g., sorting of customer complaints, threat & vulnerability classification, sentiment analysis, and customer segmentation.
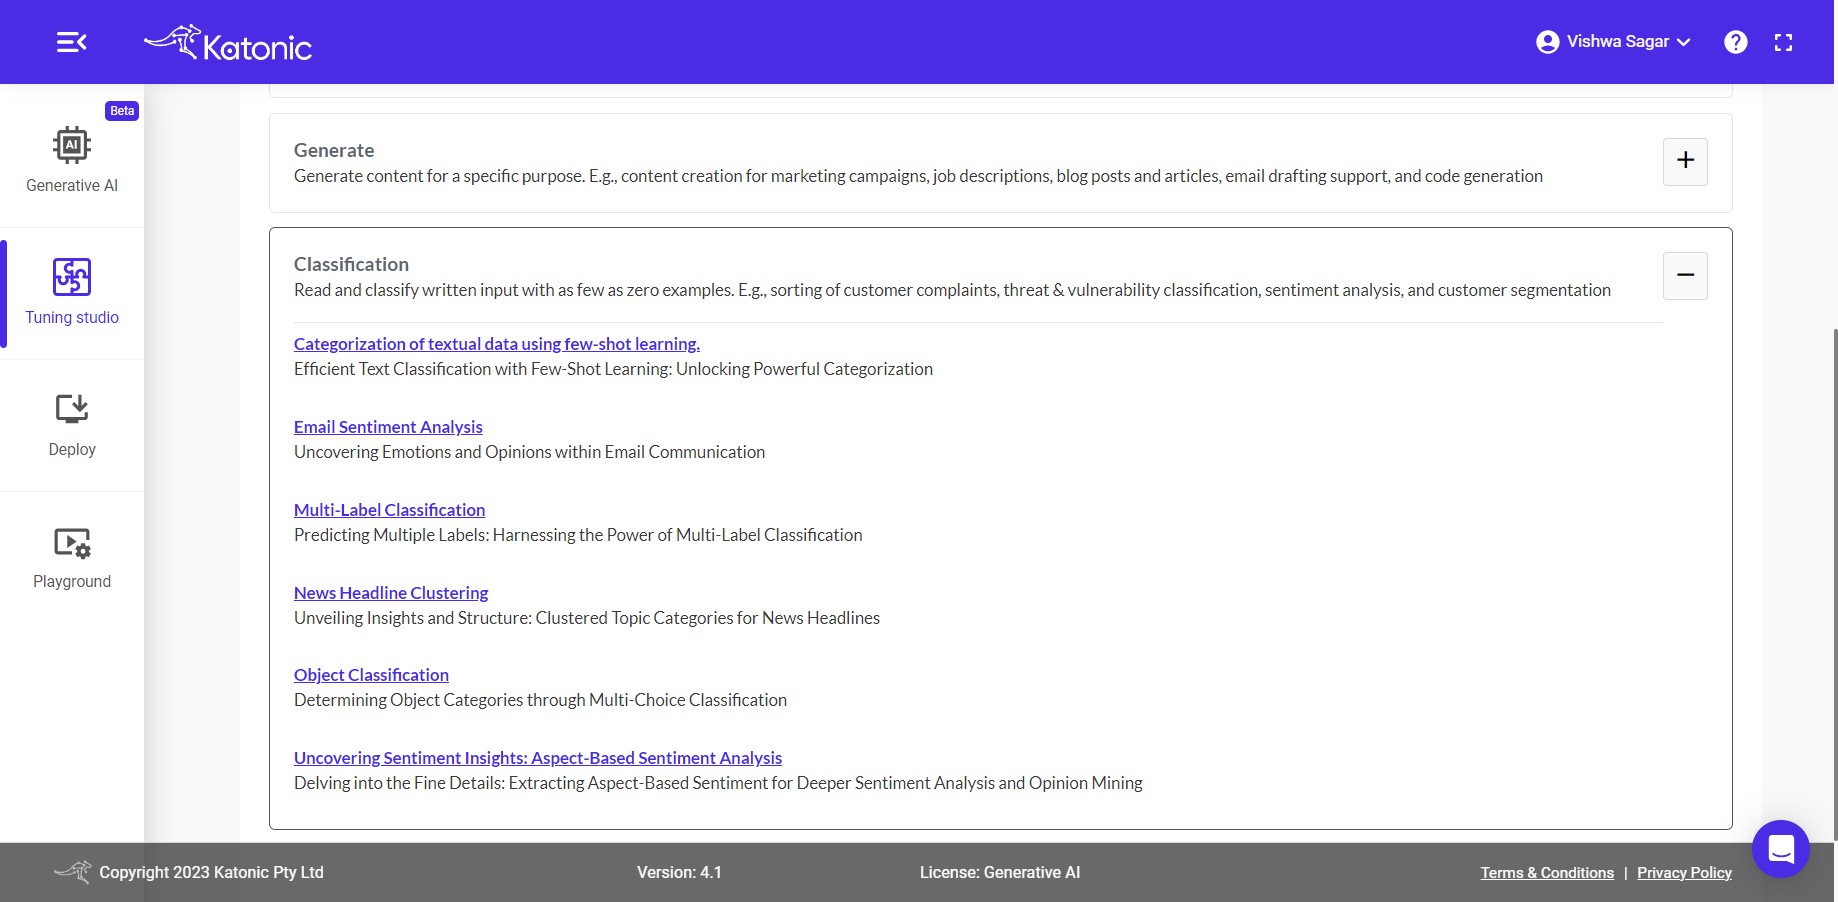
Use-cases Under Classification
4.1 Categorization of customer inquiries: Utilize few-shot learning to automatically direct customers to the appropriate service queue based on their responses.
4.2 Analyzing the sentiment associated with an individual: Unveiling Emotional Insights: Examining Sentiment Analysis of Individuals
4.3 Categorization of textual data using few-shot learning.: Efficient Text Classification with Few-Shot Learning: Unlocking Powerful Categorization.
4.4 Classifying articles for Efficient Content Management: Unraveling the Diversity: Classifying Articles for Improved Information Management
4.5 Organizing Customer Feedback: Categorization and Analysis: Streamlining Customer Feedback Analysis: Effective Categorization for Actionable Insights.
Now Let's Explore My Prompts
My Prompts:
In the My Prompts section, you will find all the prompts you have generated and saved for your tasks. This is where you can manage, edit, and organize your custom prompts to suit your workflow.
Now Let's Explore + Create new Prompt
+ Create new Prompt
Create Your Own Prompts or import existing ones.
Write you own prompts/Instructions from scratch or you can import sample prompts by clicking on Insert details from sample prompt.

A window will get opened, where all categories of sample prompts are present
Click on the category of which the prompt details to be inserted.
After clicking on category and respective use case. clikc on Insert details button. you can see the respective reflection under each section below.
Instructions, training examples, model and parameters
You can see there are 3 options Instructions, Training Examples and Test with Training model discuss further:
- Instuctions: The input area serves as the space where you can provide instructions to the model regarding the specific task it should perform with the given data. This allows you to communicate your desired outcome or objective to the model, enabling it to understand and execute the task accordingly.
Enter your Instruction
- Training Examples: To train your model with examples, you can utilize a technique known as Few-Shot Learning. In this process, you can provide input examples along with their respective expected outputs in the given input boxes. To add examples, click on the + button from the action menu. This enables you to enhance the model's understanding and improve its performance through exposure to a limited set of labeled training data.
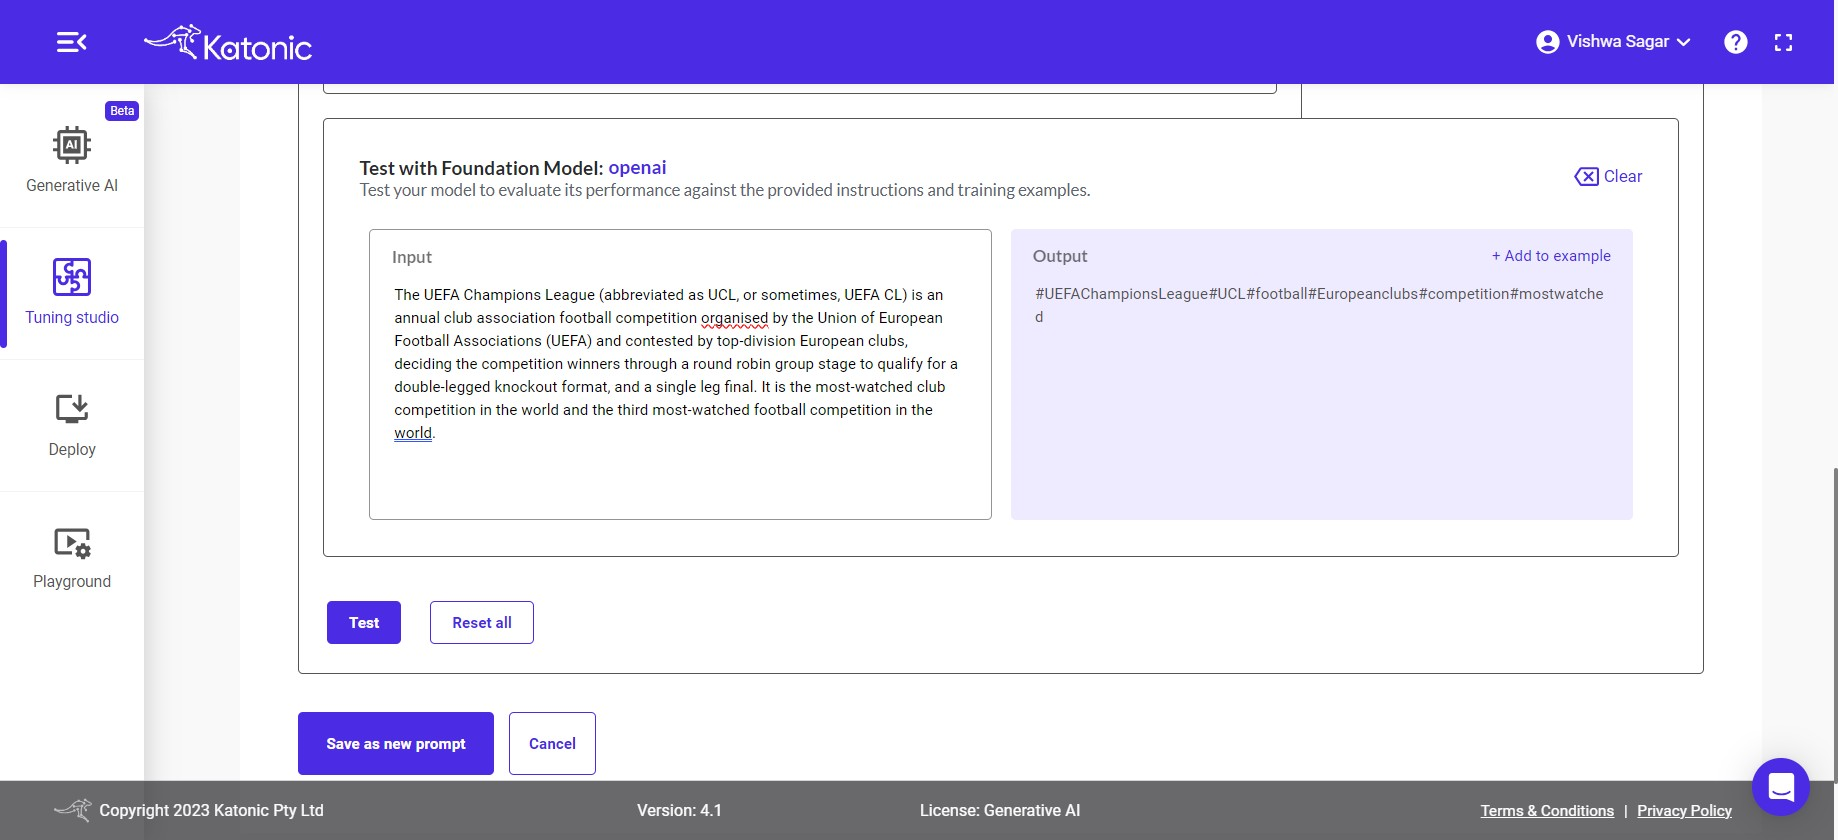
- Test with Training Model: Open AI: After you have provided either instructions or examples, you can proceed to test your model to assess its accuracy and performance. Testing allows you to evaluate how well the model understands and responds to different inputs or scenarios.
Provide your input inside the input section and then click on the test button. it'll trigger the openAI model and provide the output based on the instruction or output format you provided inside the output section.
If you wanted to add the input and output you just checked as an example inside the training example section. then click on the + add to example action button. you will see the added example in the training example section.
If you wanted to clear the input & output click on clear action. and checked again with new input.
Provide the input data that aligns with your instructions and few-shot examples. This will trigger the model to process the input and generate the corresponding output based on the trained instructions and examples.
If you are not satisfied with the output generated by the model, you have the option to experiment and adjust various aspects of the model and its parameters. This includes modifying the input instructions or examples or tweaking the model parameters to achieve more desirable results. By iteratively experimenting and fine-tuning the model, you can enhance its performance and ensure it meets your specific requirements.
Training Model & Parameters
- Training Model: you have the choice to select the training model from either OpenAI or Cohere. Both options offer powerful capabilities for training the model based on your instructions and provided examples.
Note: Cohere model will be available in the future releases.
Temperature: This parameter will range between 0 and 1. Higher values like 0.8 will make the model output more random, while lower values like 0.2 will make it more focused and deterministic.
Token limit: The maximum number of words to generate in the model output. The total length of input tokens and generated tokens is limited by the model's context length.
Top-P: An alternative to sampling with temperature, called nucleus sampling, where the model considers the results of the tokens with top_p probability mass. So 0.1 means only the tokens comprising the top 10% probability mass are considered.
Note: We generally recommend altering this or temperature but not both.
- Frequency Penalty: Number between 0 and 10. Positive values penalize new tokens based on their existing frequency in the text so far, decreasing the model's likelihood to repeat the same line verbatim.
Note: If you are not obtaining the desired accuracy in the results, it is recommended to experiment with the parameters. However, by default, It's configured with parameters that are generally suitable for a wide range of problem statements. Therefore, it is advisable to start with the default parameters and assess their performance before making any adjustments.
Finally, if you're satisfied with the output and instruction results. click on save as new prompt button to save your prompts.
One window will popup Save as new prompt.
Put your Prompt Name, Prompt category and Prompt description.

Then click on save button.
The prompt will get saved and appear on the my prompt section.